

Hip Arthroscopy/Labral Repair
Hip Arthroscopy Rehabilitation Protocol
PHASE 1 : 0 - 2 Weeks
Aim
- Protect Wound, Settle Inflammation and Swelling, Prevent Stiffness
Ice
Up to 7 - 8 times per day, ideally using your BodyICE Kit - Particularly after doing your exercises
Avoid
- Deep Hip Flexion past 90 degrees
- Rotation that causes pain
Weight Bearing
- Partial weight bearing with crutches, with flat foot on the ground
(full weight bearing as tolerated if no labral repair or bony work)
Exercises
- Exercise Bike: No resistance, high seat; 2x day for 10 - 20 mins as tolerated.
- Stretching (calf pumps, quad stretches)
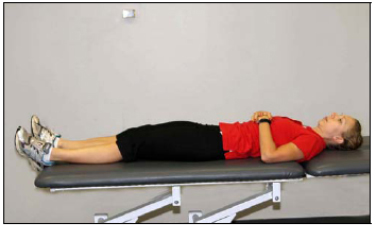
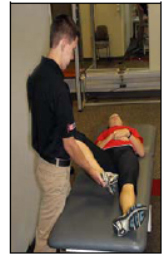
Psoas Stretch (lie supine with pillow under the hip); progress to Prone Lying Below- Prone lying "belly time"
Progress to propped on elbows, at least 20 minute twice/day
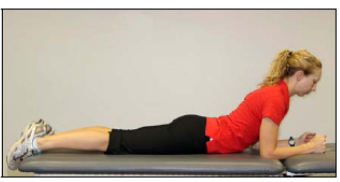
- Prone lying "belly time"
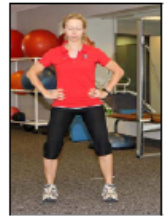
- Gluteal Activation and Isometric Stability (20secs x 5 each)
Stability
- Isometric:adbuctors (supine) IR/Er (phone)
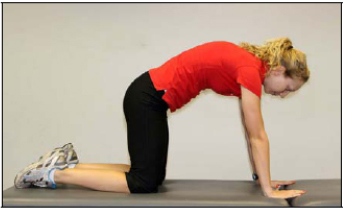
- Quadruped Rocking (can start week 2)
On your hands/knees, shift your body weight forward/back then side/side, then diagonal, and eventually into Cat/Camel mode once you feel comfortable.- Cat/camel in quadruped
- Range of Motion:
Start with gentle supine hip ‘Log Rolling’ (leg flat on the bed being rolled inwards and outwards)
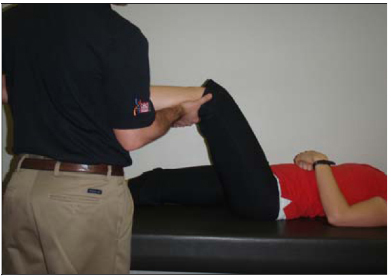
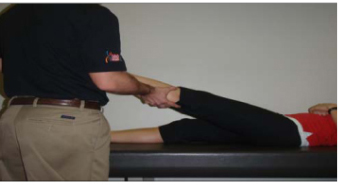
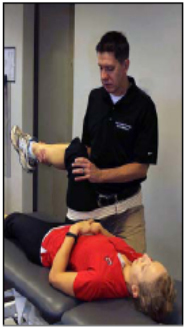
Passive Circumduction as per below (can start week 2)
-@30 degrees flexion (3 mins clockwise, 3 mins anticlockwise)
-@70 degrees flexion (3 mins clockwise, 3 mins anticlockwise) - Manual Soft Tissue Therapy: Psoas, ITB, TFL, Adductors, Gluteals (can use Foam Roller)


PHASE 2 : 2 - 6 Weeks
Aim
- Restore Painless Range of Motion
- Continue Swelling and Inflammation Control
- Ensure proper muscle activation and neuromuscular patterning : Core Stability!
- Progress to NORMAL Gait with crutches, then without Crutches (as tolerated)
Ice
Continue icing as much as tolerated/required; particularly after exercises/physiotherapy
Avoid
- Deep Hip Flexion past 90 degrees
- Rotation that causes pain
- Loading/jumping/running
Exercises
- Wean off crutches as tolerated; only once NORMAL gait and proper gluteus activation
- Scar Moblisation as required
- Continue Daily Exercise Bike; add 5mins
- Start Hydrotherapy
- Continue Phase 1 Exercises
- Focus on Core Stability Exercises
- Gluteus Activation: Start Supine and Progress as per below. Sets of 10, 3 times per day When walking focus on activating gluts especially with push off/commencement of swing phase to reduce hip flexor overuse
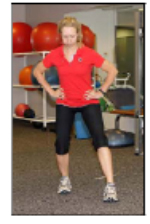
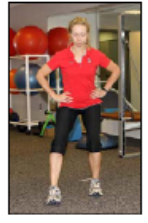
Stability- Gluteus activation progression (continue until activation is symmetrical)
Begin with involved side activation in supine/prone and progressing to kneel, half kneel, standing
- Gluteus activation progression (continue until activation is symmetrical)
- Phase 2 Exercises as per below: Perform sets of 10, 3 times per day
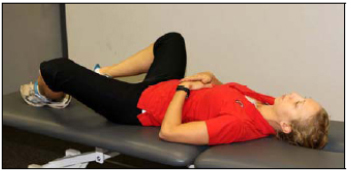
- Hook-laying butterflies and reverse butterflies
- Body Weight Shifts:
Progressing to Single Leg Balance (gluts, core are critical)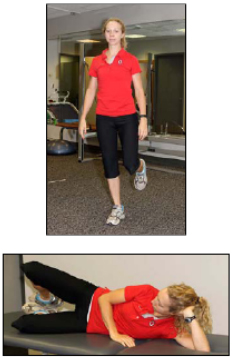
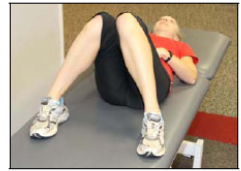
- Clam Shells:
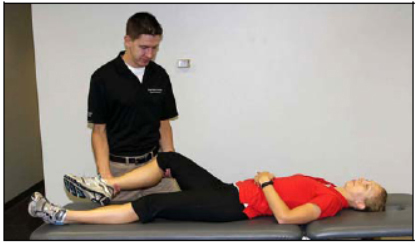
Ensure Pain Free - FABER slide progression
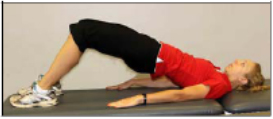
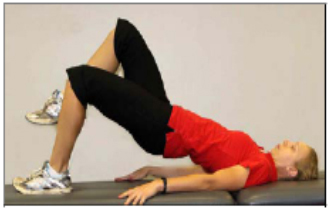
Begin at 4 weeks with PT- assisted FABER slides - Double leg bridges within pain-free ROM
- Hook-laying butterflies and reverse butterflies

Phase 3 : Intermediate Phase : 6 - 10 Weeks
Aim
- Aim for NORMAL range of motion including flexion, rotation
- Achieve EXCELLENT core stability, balance, neuromuscular patterning
- Improve Muscle Strength
Avoid
- Painful extremes of motion, 'pinching'
- Explosive movement: all repetitions should be controlled, with adequate core stability, and appropriate muscle patterning
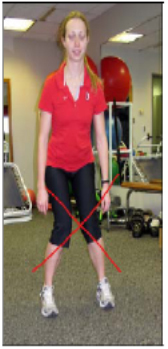
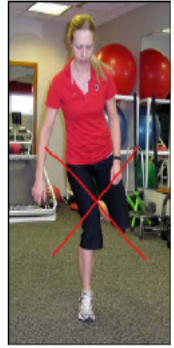
- Compensation: Particularly Anterior weight shifting, pelvic drop, valgus collapse
- Crunches, sit - ups, heavy weights
Exercises
- Continue Phase 1/2 Exercises
- Add resistance on exercise bike as pain allows
- Other cardio: Elliptical, mobile bike, walking
- Upper Body Strength and Conditioning
- Increased intensity Hydrotherapy/Swimming
- Focus on core stability/balance/proprioception: Single leg work (flat ground then uneven then unstable surface (Bosu or similar); Progress to Single leg Squat
- Phase 3 Exercises as per Below
- Manual joint mobilizations GENTLE - avoid aggressive traction
Strengthening/stability
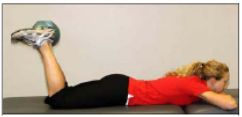
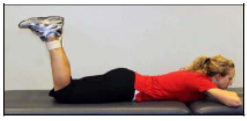
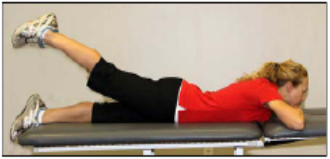
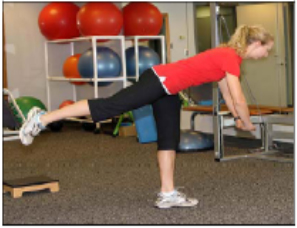
- Prone hip extension
Lie on stomach. Tight glutes and lift leg while keeping knee straight. progress to hip extension off end of plinth or over exercise ball
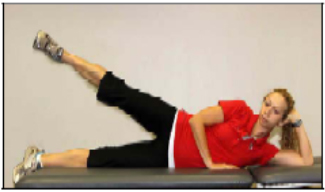
- Side laying hip abduction
Lie on uninvolved side. position upper leg in slight extension and lift up then slowly lower to starting position. keep toes facing forward and hip extended
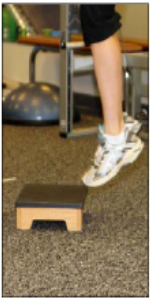
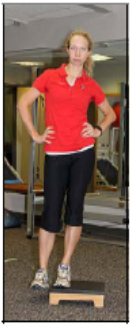
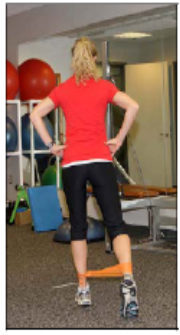
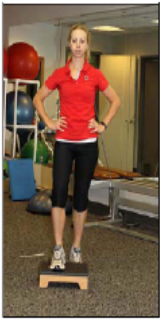
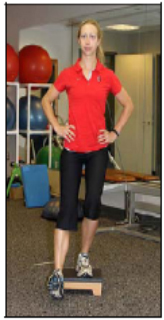
- Hip hikes
Stand sideways on a step with uninvolved leg on a 4-inch step with involved lower extremity free of the step. keep both hips facing forward with shoulders and pelvis shoulders level. while keeping your uninvolved leg straight , rise your hip straight up then lower slowly.
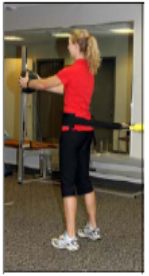
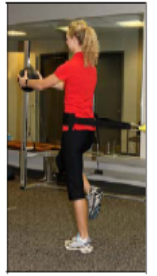
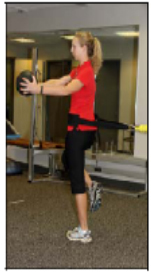
- Sport cord rotations - begin at 6 weeks
Start with double leg rotations with band around waist, progress to single leg stance rotations. patient should focus on good glute and core activation while maintaining a level pelvis and preventing any valgus collapse throughout lower extremity. Avoid pinching
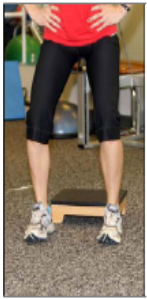
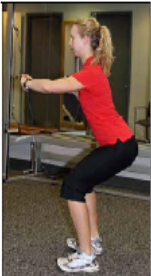
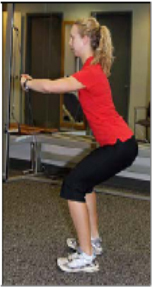
- Posterior squats
Position feet parallel to each other. emphasize proper form with knees remaining above ankles without collapsing in or out. Start with partial knee bends and increase depth per tolerance without complaints of pinching. Progress to squats on unstable surfaces. can use wall to facilitate posterior weight shift and proper squat mechanics.
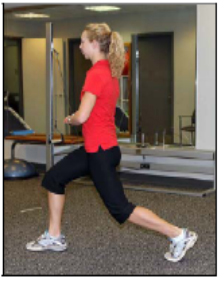
- Spilt squats/lunges
Step forward with involved lower extremity. Lower hips toward floor then push through front foot to return to starting position. Depth is dependent on patient tolerance and no complaints of pinching.
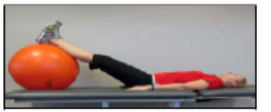
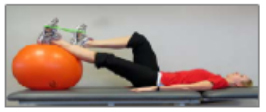
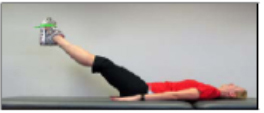
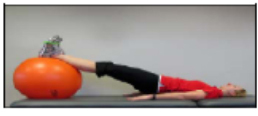
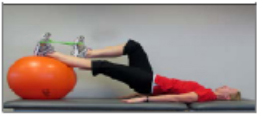
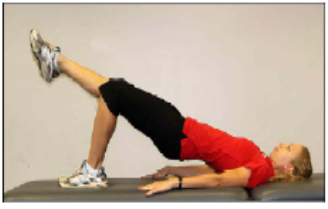
- Bridging progression
Lie on back and position both feet on ball. keep knees straight and raise hips off floor to from straight line from feet to shoulders, Return to starting position slowly
May progress to marching bridges and then single leg bridges after ~6 weeks, once able to perform double leg bridges on ball without anterior hip pain.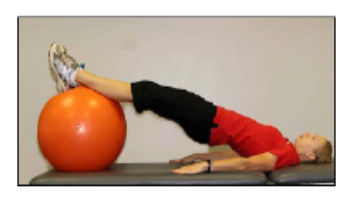
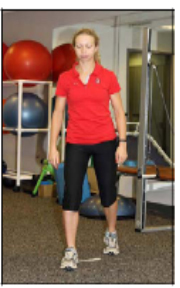
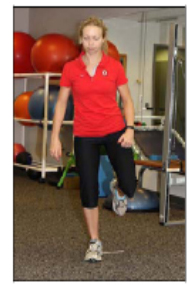
- Step and holds
position in front of mirror, step forward onto a slightly bent knee and balance for a few seconds. Maintain control of knee and do not let it move in or out. Knee shoulder remain positioned directly above foot.
- Romanian dead lift
Start with feet parallel to each other. lift uninvolved leg back and off the floor, bend forward at the hips while maintaining a straight lower back position. Only bend forward as far as you can without rounding your lower back
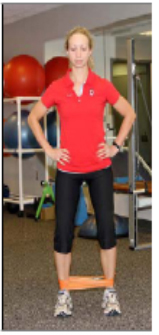
- Sidesteps
Start with knees and hips slightly flexed with resistance band positioned around ankles. keep feet and knees pointed forward as you step sideways with leading leg then take a small step in same direction with back leg while maintaining tension in band.
- Posterior reaches
Start with knees and hips slightly flexed with resistance band around ankle. step back with one leg at a 450 angle then to starting position.
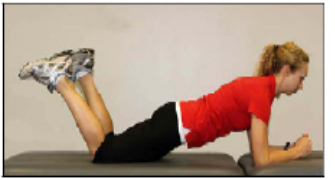
- Planks
Lie on your stomach with your elbows and forearms underneath your chest, prop yourself up to form a plank using your knees/toes and forearms for support. Maintain a flat back. Do not allow your hips to sag towards the ground.
Kneeling planks at week 6-trial full planks beginning at week 8.
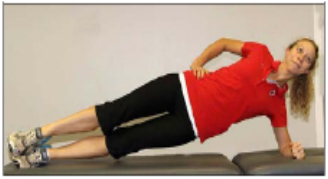
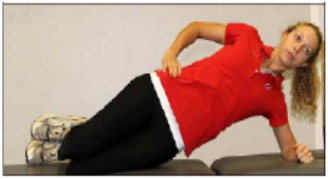
- Side planks
Lie on your side with your elbows on the ground below your shoulder. Lift yourself up to from a plank. hold this position until you can no longer maintain straight line from your shoulders to your knee/toes.
- Step-up/step-downs
Place foot on small (2-or 4-inch) step. Step up onto step then lower uninvolved foot back to the floor. Increase step height per tolerance without pain or symptoms.
- Stand with involved leg on a small step. Lower opposite foot the ground by slowly bending your knee while keeping hips/pelvis level. When foot touches ground, straighten knee and return to starting position. Control knee, do not allow knee collapse, keep knee bending toes.
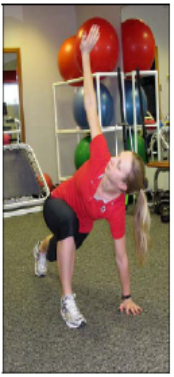
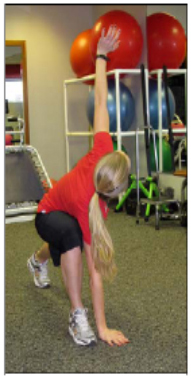
Walking Spiderman Stretch
Criteria for Progression to Phase IV:
=Ability to complete all phase 3 Exercises without increased pain, swelling or irritation
= Demonstrate full pain-free ROM with hip flexion to 115 degrees
= Full Weight-bearing without pain and no assistive and able to ambulate 15 minutes without pain of fatigue
- Manual joint mobilizations GENTLE - avoid aggressive traction


Phase 4: Advanced Rehab/Return to Sport : (10 - 16 Weeks)
Aim
- Improve balance, strength, mobility, endurance, conditioning until ready to play
Avoid
- 'Pushing Through:' New pain, swelling, stiffness is a sign to ‘scale back’
Return to Sport Criteria
- No pain on all tests; acceptable range of motion
- No compensatory movements (pelvic drop, knee valgus, anterior weight shift)
- Symmetry:
less then 10% side to side difference on single leg stance/hop, quads bulk - Confidence/Trust in your hip
- Full Fitness (conditioning, cardiovascular, upper/lower body strength)
Exercises
- Continue Phase 3 exercises plus add Plyometrics (below)
- Start Running only when comfortable, Progress to Sport Specific Training
Strenghtening/stability
- Three Position squats
Position feet parallel to each other, shoulder-width apart. Now stagger your stance so your surgery foot is in front of the non-surgery foot and feet are shoulder width apart (the father the stagger distance, the increased difficulty of exercise). Shit more bodyweight to posterior leg. Repeat with legs switched.
Band Hip Flexor Progression
Start in supine position with feet supported by ball and band around foot. pull back on band, bringing knee toward hip. Stop once knee is above hip. Avoid excessive flexion or any pinching in hip. Progress to feet unsupported then to bridge position on ball.
- Walking Lunges
Step forward with one leg in front, feet shoulder-width apart, and bend both knees to lower pelvis towards the floor. Straighten knees and step forward to advance other leg in front. you should be making forward progress. Repeat across the lenght of room. Be sure not to lower past any "pinch" pain.
Progress to walking lunges with rotation - can or pinch symptoms.
- Reverse lunge with X chop
Posterior leg elevated on surface ~1-2 feet high (low plinth, couch seat). Hold a 1-2-pound weight (medicine ball) in hands. With both knees slightly bent and arms starting at one shoulder, chop down moving weight to opposite hip. Increase knee bending as you chop down. repeat 10 times.
Then keeping legs in same position, switch starting position of arms to begin at opposite shoulder and repeat 10 times. You've made an 'X' with arm chops. Switch legs and make an 'X' with the arm chop again. - Single leg balance (advanced)
Plyometrics (10-12 Weeks)
All landings should be performed quietly and controlled, with knees behind toes and no knee valgus.
Discontinue and return to strengthening exercise if pain increases with any plyometric activity. - Double leg (DL) hops
Begin with minimal resistance, as this is one of your first plyometric exercises, Push off footplate and land with equal weight on both legs. Land with feet shoulder-width apart, knee behind toes and no valgus knee positioning. Repeat (slowly and with control) for 15 seconds before stopping.
Only progress to jogging and hops with rotation if no pain with DL hops.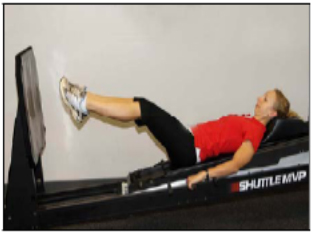
- Single leg (Sl) hops jogging
Sl hops : begin with minimal resistance. repeat (slowly and with control) for 5 seconds before stopping.
Only trial jogging and hops with rotation if there is no pain.
Jogging: with same minimal resistance, alternate SL landings on foot plate. Repeat (slowly and with control) for 15 seconds before stopping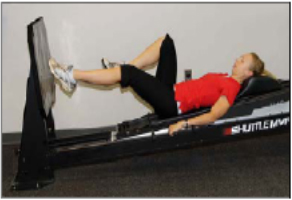
- Dl mini hops in place
Land with feet shoulder-width apart. Repeat for 15 seconds before stopping.
- Hop ups
Dl hop up to2-inch box-soft, quiet landing with good knee position. progress to 4-inch box. trail SL if not painful and with proper mechanics - hop downs
Dl hop down from 2-inch box to floor. Remember important landing mechanics progress to 4-inch box. Trial SL if not Painful and proper mechanical. -
- DL line jumps
Jump forward across the room for distance - but note that control and proper landing mechanics are more important than distance itself. Be sure each landing is quiet and controlled before beginning next jump. - SL line jumps
Jump forward across the room for distance – but note that control and proper landing mechanics are more important then distance itself. Be sure each landing is quiet and controlled before beginning next jump.
First alternative legs - jump from R to L.
Then continue on same leg - jump from R to R to R
- 3-way hop drill (Dl first and trail SL)
- Perform small Dl hops forward and backward over line for 15 seconds Remember soft and quiet landings!
- Perform small DL hops sideways back and forth over line for 15 seconds
- If no pain with above, perform small Dl rotational hops (no line needed) for 15 seconds
- keep feet shoulder-width apart and maintain proper landing mechanics before trial of SL hops
- 3-ways jog matrix
- Slowly jog forward and then backpedal to return
- Repeat down and back with side shuffling
- Repeat with carioca
- Agility ladder drills
- Begin walk/jog program after 12 weeks if able to complete above exercises without pain/pinch
criteria to progress to walk/jog program:- 20 heel touches
- Ambulation with symmetrical gait
- No weight shifts with squatting
- No pain with Sl hopping
- Consider :
Cardio : continue elliptical /bike/swimming now without pull buoy discuss duration/volume with physical therapist or physician
Shuttle
Dynamic strengthening and stability
- Three Position squats